Now that we're finally getting settled and into a routine here at the Cyr house, I am back to trying new recipes and cooking up some different meals. This one recipe is one my Mother In Law pinned on Pintrest and while she is here visiting for a night I decided I'd give it a try. Being Lactose Intolerant I can only taste test the sauce to be sure it isn't poison, but man oh man, this is a recipe you muuust try!
Oh! And this isnt a low fat or 100 calories meal, so prepare at your own risk...maybe just before gym day or just after a really good workout.
Monday, March 26
Saturday, March 24
Our New Home! --Kitchen
So been MIA for a while. But Im back! St Patricks Day didn't quite go as planned seeing as nothing was really set up here at the house...no Internet no computer or printer to finish things up. But don't worry!! We still had green beer (and wine) and a few good laughs.
Anyway so the reason I haven't been around is We Finally bought our very fist Home! Good-Bye apartments and renting! So we were a liiiittle busy with the move and all but we're finallysettled mostly settled and I'm hoping to get back into the blogging asap.
So the house we bought is a bit older, but has lots of things we can change and make it our own. Exactly what we were looking for. Tyler needed something he could work on, make his own little project. My first project....the kitchen. So I just realized I dont really have a great picture of the kitchen before...anyway here is one that shows most of it...with my crazy family :)
Very Dated hardware and arrangement going on, the kitchen; which Im sure everyone can imagine, is very important to me, so this wasn't going to fly. First thing we did was rip out that section of cabinets that was dividing the dining area and kitchen and dating the kitchen from 30 years ago.
So with help from My wonderful mother and Bestie A, we got to work degreasing, stripping and refinishing these cabinets. Yes ALL of them. It took a lot longer than I anticipated but it was soooo worth it.
What we changed:
-ripped out section of cabinets
-changed light fixtures ($100 for both)
-changed hardware on cabinets and drawers ($55)
-painted cabinets($115.00)
-removed all cupboards from dining room side and added wainscoting ($24)
So Keeping in mind we are still trying to make it homier, Ill update the pictures as I decorate the kitchen. But I wanted to get this show on the road! So we redid the cabinets using a kit from Rustoleum we purchased at Home Depot for $99.99 +tax, the kit did all of our cabinets and we still have some left.
You can purchase the kit in many different colors with different glazes, we chose the "Quilters White" and literally put the glaze on and wiped it right off to get the effect we wanted. To get a little better idea of what you're buying the kit includes:
-Chemical Sander, paint stripper (so no sanding required with this revamp!)
-Small Can of paint (they tint it at home depot for you, to whatever color you choose)
-2 cans of stain
-Small can of Top Coat
-2 Green scrubbies (go to Costco and get a package...you're going to need them!)
-3 Paint stir Sticks
-Roll of dustless cloth (aka. Cheesecloth)
Its a fairly lengthy process, removing all the doors and hardware from the cabinets then cleaning them with a very strong cleaner (we used pure degreaser because of the age of the cabinets, there was a lot of built up grime) After that we used the chemical sanding solution that was provided in the kit, applying it using green scrub pads and just scrubbing the S**t out of it...switch arms for an even workout. After that is done and is dry you paint, 2 coats, and let that dry, then apply the glaze. The longer you leave this glaze on before wiping it off with the cloth provided, the more of the wood grain that will show through. Then last but not least you give it a "Top Coat" also provided.
To finish the cabinets off we went and bought new hardware for the drawers and doors, we were able to find packs of 10 knobs and pulls that matched and were pretty close to exactly what I wanted. Everyone who knows me knows I have an eye for expensive things...the pulls I wanted were $10 each and we needed something like 31 total...soooo I went the cheaper route and I'm more than happy with the way they turned out. We were able to clean up the hinges using CLR and they match the hardware almost perfectly!! I was Happy about that. Also because we ripped a whole section of cupboards out there was a section of unfinished cupboards showing so we went to Home Depot got some paint able wainscoting and got it cut to fit and where we took off the cabinet doors on the dining room side and all the "fake drawers" we added a sheet of wainscoting to clean it up and modernize it a bit more.
All that being said and DONE (finally!) the only things left to do in the kitchen is Counter tops, replace the appliances and the stove hood. Like everyone has told us, it will be never ending the things you can do and will want to do with your new home. Good thing about it is both Tyler and I are pretty hands on, DIY kind of people, so it keeps us busy.
Bre's Next House Project
Anyway so the reason I haven't been around is We Finally bought our very fist Home! Good-Bye apartments and renting! So we were a liiiittle busy with the move and all but we're finally
So the house we bought is a bit older, but has lots of things we can change and make it our own. Exactly what we were looking for. Tyler needed something he could work on, make his own little project. My first project....the kitchen. So I just realized I dont really have a great picture of the kitchen before...anyway here is one that shows most of it...with my crazy family :)
So with help from My wonderful mother and Bestie A, we got to work degreasing, stripping and refinishing these cabinets. Yes ALL of them. It took a lot longer than I anticipated but it was soooo worth it.
| Cabinets Finished, Kitchen Painted, counter tops...next on the list! |
-ripped out section of cabinets
-changed light fixtures ($100 for both)
-changed hardware on cabinets and drawers ($55)
-painted cabinets($115.00)
-removed all cupboards from dining room side and added wainscoting ($24)
| Close-up of finish and Hardware |
You can purchase the kit in many different colors with different glazes, we chose the "Quilters White" and literally put the glaze on and wiped it right off to get the effect we wanted. To get a little better idea of what you're buying the kit includes:
-Chemical Sander, paint stripper (so no sanding required with this revamp!)
-Small Can of paint (they tint it at home depot for you, to whatever color you choose)
-2 cans of stain
-Small can of Top Coat
-2 Green scrubbies (go to Costco and get a package...you're going to need them!)
-3 Paint stir Sticks
-Roll of dustless cloth (aka. Cheesecloth)
Its a fairly lengthy process, removing all the doors and hardware from the cabinets then cleaning them with a very strong cleaner (we used pure degreaser because of the age of the cabinets, there was a lot of built up grime) After that we used the chemical sanding solution that was provided in the kit, applying it using green scrub pads and just scrubbing the S**t out of it...switch arms for an even workout. After that is done and is dry you paint, 2 coats, and let that dry, then apply the glaze. The longer you leave this glaze on before wiping it off with the cloth provided, the more of the wood grain that will show through. Then last but not least you give it a "Top Coat" also provided.
To finish the cabinets off we went and bought new hardware for the drawers and doors, we were able to find packs of 10 knobs and pulls that matched and were pretty close to exactly what I wanted. Everyone who knows me knows I have an eye for expensive things...the pulls I wanted were $10 each and we needed something like 31 total...soooo I went the cheaper route and I'm more than happy with the way they turned out. We were able to clean up the hinges using CLR and they match the hardware almost perfectly!! I was Happy about that. Also because we ripped a whole section of cupboards out there was a section of unfinished cupboards showing so we went to Home Depot got some paint able wainscoting and got it cut to fit and where we took off the cabinet doors on the dining room side and all the "fake drawers" we added a sheet of wainscoting to clean it up and modernize it a bit more.
All that being said and DONE (finally!) the only things left to do in the kitchen is Counter tops, replace the appliances and the stove hood. Like everyone has told us, it will be never ending the things you can do and will want to do with your new home. Good thing about it is both Tyler and I are pretty hands on, DIY kind of people, so it keeps us busy.
Bre's Next House Project
| Very white, half bath downstairs. |
| to be transformed into a beach themed paradise haha |
Friday, March 2
Beer Battered Fish & Chips {recipe}
I've said it before and I'll probably say it a million times, I have such picky eaters in my house that I rarely get to try "different" recipes. One thing they aren't fond of here in the Cyr household is fish. Me on the other hand, I LOVE it. Every once in awhile I say "screw it!" and make whatever I want, last night was one of those nights. Although its far from a "different" recipe, I went with the classic Beer Battered Fish & Chips. I got this recipe from the Food Network Website.
Preheat Deep fryer or a large pot with about 3" of vegetable oil in the bottom on medium heat. (be very careful when using the pot method. It splatters and oil burns HURT ALOT!)
Beat the egg whites and beer together. Mix in all the dry ingredients.
Be sure your fish is fully thawed, if it was frozen, and dry. Use a dish towel or paper towels to make sure you dry it fully! (I did not dry some pieces completely and I had a hard time getting the batter to stick)
Cut the fillets in 2 or 3 pieces, whichever you prefer, and dip them in the batter. Make sure they are fully covered in batter and then gently put the fish pieces into the oil or deep fryer.
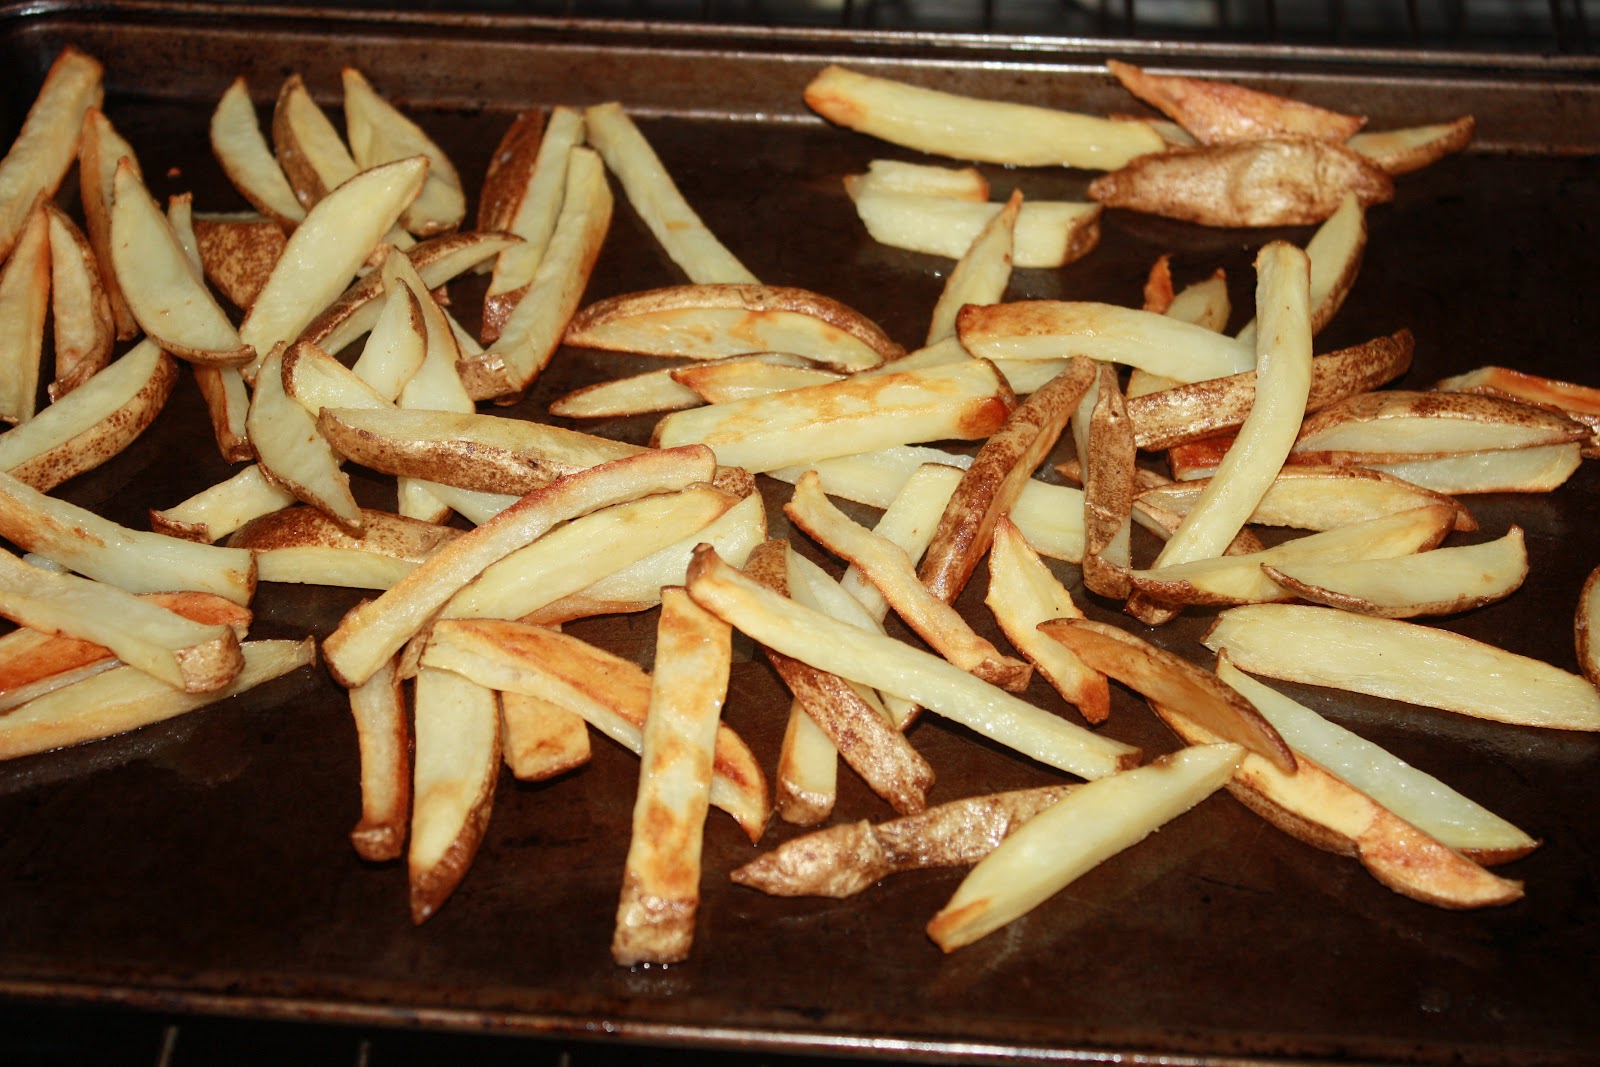
*TIP* Have everything ready to go before you put the fish in to cook, it doesnt take very long and you want to eat it as soon as it comes out of the fryer. So make the fries first, have them almost done, set up a little station something like this, and then FRY! Also have lots of Febreeze on hand for after supper, your house is going to STINK! But its so worth it!
Let the fish cook for 2-3 minutes per side, until its a nice golden Brown. Use a slotted spoon and an oven mitt to turn and get the fish out of the oil.
Serve with Lemon and Ketchup! & Enjoy!
Original Source
| Beginnings of Fish and Chips. |
Beer Battered Fish and Chips
1 3/4 c Flour
2 tsp Baking Powder
1/2 tsp Mrs. Dash Spice Blend (or your favorite spice blend)
1/4 tsp cayenne pepper
1/2 tsp salt
2 egg whites
1 can (12 oz) Beer, or de-alcoholized beer
1 1/2 lbs firm white fish fillets, haddock or halibut (I used Haddock)
Preheat Deep fryer or a large pot with about 3" of vegetable oil in the bottom on medium heat. (be very careful when using the pot method. It splatters and oil burns HURT ALOT!)
Beat the egg whites and beer together. Mix in all the dry ingredients.
Be sure your fish is fully thawed, if it was frozen, and dry. Use a dish towel or paper towels to make sure you dry it fully! (I did not dry some pieces completely and I had a hard time getting the batter to stick)
Cut the fillets in 2 or 3 pieces, whichever you prefer, and dip them in the batter. Make sure they are fully covered in batter and then gently put the fish pieces into the oil or deep fryer.
*TIP* Have everything ready to go before you put the fish in to cook, it doesnt take very long and you want to eat it as soon as it comes out of the fryer. So make the fries first, have them almost done, set up a little station something like this, and then FRY! Also have lots of Febreeze on hand for after supper, your house is going to STINK! But its so worth it!
| Best to be prepared, have your little work station all set up. |
| ...and your "chips" just about ready. |
| BE CAREFUL!! Or you'll end up with little red dots all over your arm like moi...not cool. |
| Golden Beer Battered Fish, perfect for pub night at home. |
| Fish and Chips Mates? |
Original Source
Thursday, March 1
Who Needs A Photo Booth?
So I've decided to take a break from packing and staring at the mess of boxes everywhere to work on a few things for St Patrick's Day. When we had parties we used to take so many pictures, but these days we've stopped for some reason...and I don't like it ONE LITTLE BIT! So I was thinking we could have a few little props around and make it more fun. As always we like to do things on a very small budget, takes a bit of research but it CAN and will be done! Step one, find the props to fit your party style!
I found these Free Photo Booth Printables from Oh Happy Day
Then To Go with the "accessories" I found some classic Moustaches and Lips on the Catch My Party Site, provided by the Paper Dolls Shoppe.
Knowing the attendees of our parties, we should get some doozie pictures on St Patty's Day.
Here's another link for some hats, glasses and speech bubbles Ill be adding to the collection. These Photo Booth Props are from Accent the Party. Remember All you need is card stock, hot glue gun, dowels or skewers (for the smaller ones) and you've got the ingredients for some serious picture taking! And don't toss them after the party, keep them and pull them out for your next shindig.
I found these Free Photo Booth Printables from Oh Happy Day
![]() |
| photo props from "Oh Happy Day" |
![]() |
| Photo Props from Paper Dolls Shoppe |
Knowing the attendees of our parties, we should get some doozie pictures on St Patty's Day.
Here's another link for some hats, glasses and speech bubbles Ill be adding to the collection. These Photo Booth Props are from Accent the Party. Remember All you need is card stock, hot glue gun, dowels or skewers (for the smaller ones) and you've got the ingredients for some serious picture taking! And don't toss them after the party, keep them and pull them out for your next shindig.
| Binks trying out some props! I think they'll be perfect. |
Thursday, February 23
Beginning Of St Pattys day {& apologies!}
OK I realize I have been MIA for a while, haven't been doing much cooking or crafting these days just started PACKING!! The Husband and I just bought our first house, which was very stressful and overwhelming, but now that that part is all over its time to pack this place up and move on! The house we are moving into needs some Bre touches, so I fore-see a few blog posts about painting, decorating and re-doing cabinets. Once we are moved in and settled I'll be posting Before and After photos on the Blog.
Lately I have been working on some ideas for the St Patricks Day Party we will be hosting. I have a link to some Free Printables to share too, from Bird's Party.
Don't forget about the Subway art from eighteen25 I posted about not long ago, they do have a St Patty's Day one! The eighteen25 Blog also has a St Patty's day themed "You Gotta See This" post, you can see all those ideas here.
I have also cut and glittered another cardboard banner for the occasion, not quite done but here's where I'm at with that. Needs some ribbon and some kind of accent on the background I think.
Other than making THIS Leprechaun craft with Charlee the other day, that has been the extent of my creativity these days =( Im hoping to get all the St Patricks Day things out of the way before the Big move, so I'll be updating you on ideas, and menus. Keep Checking back!
Lately I have been working on some ideas for the St Patricks Day Party we will be hosting. I have a link to some Free Printables to share too, from Bird's Party.
Don't forget about the Subway art from eighteen25 I posted about not long ago, they do have a St Patty's Day one! The eighteen25 Blog also has a St Patty's day themed "You Gotta See This" post, you can see all those ideas here.
I have also cut and glittered another cardboard banner for the occasion, not quite done but here's where I'm at with that. Needs some ribbon and some kind of accent on the background I think.
| My one lonely little craft... |
Other than making THIS Leprechaun craft with Charlee the other day, that has been the extent of my creativity these days =( Im hoping to get all the St Patricks Day things out of the way before the Big move, so I'll be updating you on ideas, and menus. Keep Checking back!
Wednesday, February 15
Pintrest & Subway Art
Ok I realize that "Subway Art" has been around for awhile, you see it everywhere. At first I didn't really get it, but I must say...I have grown to love it! So today while cruising around pintrest I came across this really cute St Patty's Day one, and it was posted on a "Printables" board, so I went to check it out. JACKPOT!
On this site, eighteen25 they have Subway Art for every Holiday and then some other cute ones too. So I've decided to share, its such a cute and low cost way to decorate for a party or just your home. Cute frame a Costco Print and you're on your way. Here is your first step, FREE Printable Subway Art.
While your there, be sure to check out the rest of their site, its really great. They also have many many pintrest boards all of which are filled with great Pins.
This was my great find for the day, so I thought I`d share. If you have Pintrest and want to see what I`ve been looking at you can!
Thursday, February 9
Homemade Bread--From Scratch!
When I was in College, taking cooking, we used to bake bread almost every day, and it always turned out. Taking my newly learned skills home, I tried this same recipe for bread...well folks I ended up with an inedible DOOR STOP! Very discouraging when you spend hours, kneading and waiting, and portioning and waiting some more, only for it to NOT rise when its in the pan and become nothing more than a solid mass. I didn't make bread for years.
About 2 years ago Mom and Dad gave me their bread maker, so I decided to try again, I made the dough in the bread maker then took it out to rise and bake in the oven. (These were the days before the Kitchen-Aid) It was edible, but it wasn't that AMAZING homemade bread like Grandma made. So after a few attempts I gave up on this too.
A few weekends ago mom and dad came up to Babysit the littlemonster Princess and brought homemade bread they had made. It was soooo good. The urge to play Suzy homemaker and try again came over me, and today I finally did it. And in case you hadn't guessed by the post, IT WORKED!
Here is the recipe I used, its from the old school Purity Cookbook like your Mother and Grandmother had. I halved it because...well I didn't need 17 loaves (well not quite) of Bread for our house. You can make the whole thing and freeze it, I'll probably do this next time, now that I know I can actually do it.
Dissolve 1 tsp sugar in 1/2c warm water and sprinkle 1 package of yeast over the top, 8g. let sit for 10 minutes, then whisk with a fork.
Scald 1c of milk
Pour into a large bowl and add:
2 tbsp sugar
2 tsp salt
2 tbsp shortening
1/2 c water
Stir until the shortening melts, cool to lukewarm.
Add yeast mixture to milk and add 2 1/2 c flour. Mix (I used my Kitchen-Aid, with the dough hook attachment)
Gradually add 2-2 1/2 c flour, ensuring that each time the flour is mixed into the dough. You may need to add it all or not. I ended up using 4 1/4(ish) cups of flour when I made it this morning. If your dough becomes too dry, add some water 1 tbsp at a time.
Cover and let rise for 1 1/2 hours, until doubled, in a warm place.
(Bre's proofing Trick: When I start getting stuff ready for the bread I turn the oven on 300. I then turn it off and keep the door shut, when I'm ready for the bread to rise I stick it in the oven covered with a dish towel, and leave the oven door open a crack. Works like a charm!)
Punch Down and put in greased pans, as rolls or loaves, cover and let rise to double the size and bake at 425 for 30-35minutes. (check at 20)
When you tap on the top of the loaf and it sounds hollow, that's when you know its ready. (trick from school)
About 2 years ago Mom and Dad gave me their bread maker, so I decided to try again, I made the dough in the bread maker then took it out to rise and bake in the oven. (These were the days before the Kitchen-Aid) It was edible, but it wasn't that AMAZING homemade bread like Grandma made. So after a few attempts I gave up on this too.
A few weekends ago mom and dad came up to Babysit the little
*Insert Very very Very Happy Dance here*
Not only does it LOOK like bread and smell like bread, when you pick it up, its light and squishy and I don't think it would make a very good Door Stop.Here is the recipe I used, its from the old school Purity Cookbook like your Mother and Grandmother had. I halved it because...well I didn't need 17 loaves (well not quite) of Bread for our house. You can make the whole thing and freeze it, I'll probably do this next time, now that I know I can actually do it.
White Bread
(Makes 1 loaf; 1 pan rolls)
Dissolve 1 tsp sugar in 1/2c warm water and sprinkle 1 package of yeast over the top, 8g. let sit for 10 minutes, then whisk with a fork.
Scald 1c of milk
Pour into a large bowl and add:
2 tbsp sugar
2 tsp salt
2 tbsp shortening
1/2 c water
Stir until the shortening melts, cool to lukewarm.
Add yeast mixture to milk and add 2 1/2 c flour. Mix (I used my Kitchen-Aid, with the dough hook attachment)
Gradually add 2-2 1/2 c flour, ensuring that each time the flour is mixed into the dough. You may need to add it all or not. I ended up using 4 1/4(ish) cups of flour when I made it this morning. If your dough becomes too dry, add some water 1 tbsp at a time.
Cover and let rise for 1 1/2 hours, until doubled, in a warm place.
(Bre's proofing Trick: When I start getting stuff ready for the bread I turn the oven on 300. I then turn it off and keep the door shut, when I'm ready for the bread to rise I stick it in the oven covered with a dish towel, and leave the oven door open a crack. Works like a charm!)
Punch Down and put in greased pans, as rolls or loaves, cover and let rise to double the size and bake at 425 for 30-35minutes. (check at 20)
When you tap on the top of the loaf and it sounds hollow, that's when you know its ready. (trick from school)
Subscribe to:
Posts (Atom)