More than likely I won't be able to Blog nearly as much as one would like with all these exciting changes. So I was thinking how can I keep people up to date with what I'm making these days? Like the answer to a lot of questions...Pintrest was the answer! Obviously I will still be cooking meals at home, family still needs to eat, and I promise I will take pictures and post as much as I can but my quick alternative was to give you my review on some of the recipes you may have pinned on pintrest.
I've said it before "Pintrest is the new google", when I want a recipe I go to Pintrest and search that way...some of them LOOK really good, but might not taste good. So I've created a Board called "recipe reviews", on this Board you will find recipes I have tried and written below are my comments. Yes written by me and not someone from 134 pins ago, scouts honor.
So here's the link! When I update it, Ill be sure to post the updates. If you have tried a recipe from Pintrest, or Pinned a recipe and its a MUST TRY! Be sure to let me know, I'm always on the hunt for great recipes. :) Happy Pinning and Happy Cooking!
Recipe Review Board ...sounds all fancy, but its really just Pintrest ;)

Food...Drinks...Parties and everything in between
Tuesday, July 10
SAHM No Longer
So lately I've been suuppeer slack with the blogging! Pretty much since the beginning of 2012, I'm awful! It has been a very busy and exciting year for us so far, with lots of things to keep me extra busy. House, Puppy, and now I'm going back to work!! Finally! For the past 5 years I've been a SAHM, raising my little Princess, and now that she'll be starting school in September that's all changing.
The past couple days have been very stressful (for Charlee and myself) but any big change tends to have that effect on me, and unfortunately I have passed my "stressing out" gene on. Sunday was my freak out day, worrying about Charlee going to a new room at her preschool and being there all day, meeting new friends and fitting in. Its the same preschool she's gone to since September and we were lucky enough to get her in the room with the same teacher she's had since September too. (and yet I still stress, oy vei!) Then myself meeting and getting to know new co-workers and lets face it....fitting in. Of course Monday was fine, just had one minor upset in the morning with dropping her off at Pre-School, for both of us. Thank-Goodness for her amazing PreSchool teacher Miss Carolyn, although I left teary eyed, I knew I didn't need to stress about her because she was in great hands.
My Monday was great too! We were visiting the suppliers for the restaurant, very interesting, and it was great to get to know people a little better and in a social atmosphere rather than at work. Ok I guess I should back track a bit...So if you didn't know already I'm a Cook by trade, went to NSCC took cooking, worked for 2 years then had Charlee. Within the past 2 years I was starting to get bored....very very bored...So I thought that maybe I would go back to school and do something else. I looked numerous times at online courses, courses offered at NSCC here in the city, and nothing seemed better than the certificate I already have. So I gave up on the school, I guess I was meant to cook.
One day while driving Binks to PreSchool I saw a sign that the old Bakery directly across the road was being renovated into a restaurant and they were hiring. So naturally I went home, Looked them up on Facebook, which you should do right now...Edible Matters.....make sure you "like" them to get all the wicked awesome updates! Edible Matters in a nutshell Cafe/Catering and Pantry; Everything made from scratch, as much local as possible, amazing people! Amazing concept, great location! So I applied, and after 2 nerve racking interviews I got a job! A real life grown-up job. Iwas am so excited. So last week we had orientation met all the big bosses and did a tour of the restaurant (which is still undergoing some finishing touches), then Yesterday we went to see some of the local suppliers for the restaurant. FIELD TRIP!! Was a great time getting to know people and learning where the product we'll be working with is coming from, also got a killer burn. This Cook is Cooked.
So all in all its been a busy, and exciting little bit around here. I'm very sad to give up the SAHM title, but happy to take back my "Cook" title. Excited to start a new Chapter in my life :)
The past couple days have been very stressful (for Charlee and myself) but any big change tends to have that effect on me, and unfortunately I have passed my "stressing out" gene on. Sunday was my freak out day, worrying about Charlee going to a new room at her preschool and being there all day, meeting new friends and fitting in. Its the same preschool she's gone to since September and we were lucky enough to get her in the room with the same teacher she's had since September too. (and yet I still stress, oy vei!) Then myself meeting and getting to know new co-workers and lets face it....fitting in. Of course Monday was fine, just had one minor upset in the morning with dropping her off at Pre-School, for both of us. Thank-Goodness for her amazing PreSchool teacher Miss Carolyn, although I left teary eyed, I knew I didn't need to stress about her because she was in great hands.
My Monday was great too! We were visiting the suppliers for the restaurant, very interesting, and it was great to get to know people a little better and in a social atmosphere rather than at work. Ok I guess I should back track a bit...So if you didn't know already I'm a Cook by trade, went to NSCC took cooking, worked for 2 years then had Charlee. Within the past 2 years I was starting to get bored....very very bored...So I thought that maybe I would go back to school and do something else. I looked numerous times at online courses, courses offered at NSCC here in the city, and nothing seemed better than the certificate I already have. So I gave up on the school, I guess I was meant to cook.
One day while driving Binks to PreSchool I saw a sign that the old Bakery directly across the road was being renovated into a restaurant and they were hiring. So naturally I went home, Looked them up on Facebook, which you should do right now...Edible Matters.....make sure you "like" them to get all the wicked awesome updates! Edible Matters in a nutshell Cafe/Catering and Pantry; Everything made from scratch, as much local as possible, amazing people! Amazing concept, great location! So I applied, and after 2 nerve racking interviews I got a job! A real life grown-up job. I
So all in all its been a busy, and exciting little bit around here. I'm very sad to give up the SAHM title, but happy to take back my "Cook" title. Excited to start a new Chapter in my life :)
Tuesday, June 12
Homemade Mac & Cheese
Recently we received a call from our TV Provider saying we were eligible for 2 free add on packages. Thank Goodness I answered the phone and not Hubby!! Naturally I opted for the package with the Food and DIY network, any woman would. In case you don't know already, watching the Food Network at 8pm is never a good idea. Anyway last night we were watching Diners Drive Ins and Dives....always a bad idea for your arteries. This one restaurant served up Ribs with homemade Mac and Cheese....what did I make for Supper you ask? Ribs with Homemade Mac and Cheese :)
Regular ole Mac and Cheese is something I have never made before so I didn't have a go to recipe, so I went on the hunt. Finding a new recipe for me is a chore, I have to read all the ingredients to at least 3 recipes then I choose which one I like, and have all the ingredients for. Next Step, decide what Im going to change (because heaven forbid I follow a recipe)....you can see where this is going right....lengthy process. Anyway I had to do that today for the Mac and Cheese and I must say...success. I will definitely make this recipe again, and when I decide that I have to share.
1 Box of Pasta of your Choice (I used shells...yes for Macaroni and Cheese I used Shells)
1 tbsp Butter
6 oz evaporated Milk (I used regular milk)
6 oz Shredded Cheddar Cheese (I added a bit of Parm as well)
1 egg, beaten
1 tsp dry mustard (I used 1/2 tsp, not a fan of the dry mustard in things but a little does help the flavor)
1/4 tsp chili pepper (I used a pinch of chili flakes)
S&P
Cook pasta according to the box directions, less one minute. Drain and put back into the pot.

Over Med-Low Heat, add butter and stir until melted
Mix egg, milk and spices into pasta. Stir until thickens a bit (3-5 minutes)
Remove the pan from heat, add cheese in 4 batches making sure the first is completely melted before adding the next,
Serve Immediately and Enjoy!
We served ours up along side Slow Cooker Ribs tonight, but it could be a great Main as well.

Regular ole Mac and Cheese is something I have never made before so I didn't have a go to recipe, so I went on the hunt. Finding a new recipe for me is a chore, I have to read all the ingredients to at least 3 recipes then I choose which one I like, and have all the ingredients for. Next Step, decide what Im going to change (because heaven forbid I follow a recipe)....you can see where this is going right....lengthy process. Anyway I had to do that today for the Mac and Cheese and I must say...success. I will definitely make this recipe again, and when I decide that I have to share.
 |
| When your using a recipe off the net, do you write the recipe down or just bring the computer to the kitchen? I'm old school, I need to write it down. If I like it I add it to my recipe binder. |
Homemade Mac & Cheese
1 Box of Pasta of your Choice (I used shells...yes for Macaroni and Cheese I used Shells)
1 tbsp Butter
6 oz evaporated Milk (I used regular milk)
6 oz Shredded Cheddar Cheese (I added a bit of Parm as well)
1 egg, beaten
1 tsp dry mustard (I used 1/2 tsp, not a fan of the dry mustard in things but a little does help the flavor)
1/4 tsp chili pepper (I used a pinch of chili flakes)
S&P
Cook pasta according to the box directions, less one minute. Drain and put back into the pot.

Over Med-Low Heat, add butter and stir until melted
Mix egg, milk and spices into pasta. Stir until thickens a bit (3-5 minutes)
Remove the pan from heat, add cheese in 4 batches making sure the first is completely melted before adding the next,
Serve Immediately and Enjoy!
We served ours up along side Slow Cooker Ribs tonight, but it could be a great Main as well.

Thursday, May 17
Baby Shower: About to *Pop*
One of the projects I've been working on these days is a Baby Shower for friends of mine and Tyler's. Annabelle is due August 6th (the day after Charlee's Birthday!!) and on June 2nd we will Celebrate her and her baby bump!
Baby Showers are always so fun and cheerful, I love planning them! I have only hosted one other one, a boy shower, and this time I get to do a girly shower. Check out the Polka Dot Shower Ash and I did for our Bestie J this time last year, here! While researching for the shower, there was one theme that kept popping out at me.
I have just started crafting and working on things but (of course!) I do have a pintrest board with some About to Pop Baby Shower ideas I'd like to share with you.
Baby Shower: About to Pop Pintrest Board
So I have been shopping and if you've ever seen or attended any of my parties you know we like to do it on a budget here. Buy a few key things and make everything else, and of course recycle from previous parties. Here's my shopping so far!
Newest Member Of the Cyr Family
My oh My I have been slack, but its seems like I've been quite Busy. I know its been said 10,000 times, but Lord!! A house is a lot of work! I used to be a clean fanatic, everything had to have its place and had to be spotless, if that ever happens in this house....its because we hired a maid.
To add to the destruction and mess we've added a new member to the family. Small things always make the most noise and the biggest mess. Meet Sophie!
 Sophie is a, now 10 week old, West Highland
 Terror (oops) Terrior. She is adorable and a handful, but we Love her very much. Especially Charlee. Sophie is not yet trained, so THIS is what has been taking up my time, not an easy feat. let me tell you. But we're slowly making progress, its a test of patience and learning experience for all involved.
If you and you're family are thinking about getting a new puppy or kitten you should definitely check out Purina's website. You have to sign up, but they send you an information package about your new family member, coupons for free food, and some cute heart bling for the baby. We did this for both our pets when we got them and the information is really helpful, especially if you've never trained a dog before.
Purina: My Puppy
Purina: My Kitten
To add to the destruction and mess we've added a new member to the family. Small things always make the most noise and the biggest mess. Meet Sophie!

If you and you're family are thinking about getting a new puppy or kitten you should definitely check out Purina's website. You have to sign up, but they send you an information package about your new family member, coupons for free food, and some cute heart bling for the baby. We did this for both our pets when we got them and the information is really helpful, especially if you've never trained a dog before.
Purina: My Puppy
Purina: My Kitten
Sunday, April 29
Free Gardening Tools!
MARCH 26th!!! I cant believe its been a month since I have posted! Slacker! Well I do have a bit of an excuse, you see there was a tiny mishap with a giant glass of wine annnnddd...weeellll my laptop. Wine+Laptop=drunk laptop! I would press A it would type T, lush. Anyway so my Dad has my laptop replacing the keyboard so I can get back to blogging, pinning and all those very important things in life.
Because Im not browsing facebook and pintrest 3 hours a day, turns out I have a lot of spare time! Who would have thought. So I've been working on the yard. Cleaning up existing flower beds, revamping flower beds, making new ones, digging gardens, starting vegetables. Turns out I really really enjoy gardening...both varieties.
The other day I did have a chance (using Hubby's work computer...shh!) to glance at pintrest. I ventured for the first time into the "Garden" section of Pintrest I was looking for gardening tips and ideas. Found some great ones, recycled gardening "tools". So without even going to the store I was able to start my cucumber seeds so come the May, after the full moon, they'll be ready to go in my newly dug garden.

 Don't wrap the news paper too tightly you want to be able to slide it off withouth ripping it. Showing a little local hockey pride there, Go Moose!
Then simply fill your cups with dirt and plant your seeds. Keep them in the house in the sunlight until after the Full Moon in May I'm told. Then its planting season. I am using these to start our cucumber seeds in the house. You can't use these for root vegetables such as carrots and beets because they won't be able to grow down, those are best planted straight in the garden. But plants such as beans, cucumbers, tomato can be started now in the house.
Don't forget to water them after you plant the seeds. How you wonder? Using your recylced watering can of course!
Using a plastic milk jug, one with a screw on top, punch holes in the cap and fill with water. VOILA! Free watering can, good to keep in the house smaller than lugging the big one in from outside. Pots and a watering can for FREE! And of course all these ideas came from none other than Pintrest!
Because Im not browsing facebook and pintrest 3 hours a day, turns out I have a lot of spare time! Who would have thought. So I've been working on the yard. Cleaning up existing flower beds, revamping flower beds, making new ones, digging gardens, starting vegetables. Turns out I really really enjoy gardening...both varieties.
The other day I did have a chance (using Hubby's work computer...shh!) to glance at pintrest. I ventured for the first time into the "Garden" section of Pintrest I was looking for gardening tips and ideas. Found some great ones, recycled gardening "tools". So without even going to the store I was able to start my cucumber seeds so come the May, after the full moon, they'll be ready to go in my newly dug garden.
 |
| What you'll need |

Take a sheet of newspaper, cut it in 2 down the center crease lenthwise, so you have 1 page of newspaper. Then you fold the page in thirds. Position your can of soup like in the picture, the roll it. Put a piece of tape to hold it together, then fold in the bottom and tape.

Then simply fill your cups with dirt and plant your seeds. Keep them in the house in the sunlight until after the Full Moon in May I'm told. Then its planting season. I am using these to start our cucumber seeds in the house. You can't use these for root vegetables such as carrots and beets because they won't be able to grow down, those are best planted straight in the garden. But plants such as beans, cucumbers, tomato can be started now in the house.
Don't forget to water them after you plant the seeds. How you wonder? Using your recylced watering can of course!
Using a plastic milk jug, one with a screw on top, punch holes in the cap and fill with water. VOILA! Free watering can, good to keep in the house smaller than lugging the big one in from outside. Pots and a watering can for FREE! And of course all these ideas came from none other than Pintrest!
Monday, March 26
Homemade Pasta Alfredo Sauce
Now that we're finally getting settled and into a routine here at the Cyr house, I am back to trying new recipes and cooking up some different meals. This one recipe is one my Mother In Law pinned on Pintrest and while she is here visiting for a night I decided I'd give it a try. Being Lactose Intolerant I can only taste test the sauce to be sure it isn't poison, but man oh man, this is a recipe you muuust try!
Oh! And this isnt a low fat or 100 calories meal, so prepare at your own risk...maybe just before gym day or just after a really good workout.

Oh! And this isnt a low fat or 100 calories meal, so prepare at your own risk...maybe just before gym day or just after a really good workout.

Saturday, March 24
Our New Home! --Kitchen
So been MIA for a while. But Im back! St Patricks Day didn't quite go as planned seeing as nothing was really set up here at the house...no Internet no computer or printer to finish things up. But don't worry!! We still had green beer (and wine) and a few good laughs.
Anyway so the reason I haven't been around is We Finally bought our very fist Home! Good-Bye apartments and renting! So we were a liiiittle busy with the move and all but we're finallysettled mostly settled and I'm hoping to get back into the blogging asap.

So the house we bought is a bit older, but has lots of things we can change and make it our own. Exactly what we were looking for. Tyler needed something he could work on, make his own little project. My first project....the kitchen. So I just realized I dont really have a great picture of the kitchen before...anyway here is one that shows most of it...with my crazy family :)


Very Dated hardware and arrangement going on, the kitchen; which Im sure everyone can imagine, is very important to me, so this wasn't going to fly. First thing we did was rip out that section of cabinets that was dividing the dining area and kitchen and dating the kitchen from 30 years ago.
So with help from My wonderful mother and Bestie A, we got to work degreasing, stripping and refinishing these cabinets. Yes ALL of them. It took a lot longer than I anticipated but it was soooo worth it.
What we changed:
-ripped out section of cabinets
-changed light fixtures ($100 for both)
-changed hardware on cabinets and drawers ($55)
-painted cabinets($115.00)
-removed all cupboards from dining room side and added wainscoting ($24)
So Keeping in mind we are still trying to make it homier, Ill update the pictures as I decorate the kitchen. But I wanted to get this show on the road! So we redid the cabinets using a kit from Rustoleum we purchased at Home Depot for $99.99 +tax, the kit did all of our cabinets and we still have some left.
You can purchase the kit in many different colors with different glazes, we chose the "Quilters White" and literally put the glaze on and wiped it right off to get the effect we wanted. To get a little better idea of what you're buying the kit includes:
-Chemical Sander, paint stripper (so no sanding required with this revamp!)
-Small Can of paint (they tint it at home depot for you, to whatever color you choose)
-2 cans of stain
-Small can of Top Coat
-2 Green scrubbies (go to Costco and get a package...you're going to need them!)
-3 Paint stir Sticks
-Roll of dustless cloth (aka. Cheesecloth)
Its a fairly lengthy process, removing all the doors and hardware from the cabinets then cleaning them with a very strong cleaner (we used pure degreaser because of the age of the cabinets, there was a lot of built up grime) After that we used the chemical sanding solution that was provided in the kit, applying it using green scrub pads and just scrubbing the S**t out of it...switch arms for an even workout. After that is done and is dry you paint, 2 coats, and let that dry, then apply the glaze. The longer you leave this glaze on before wiping it off with the cloth provided, the more of the wood grain that will show through. Then last but not least you give it a "Top Coat" also provided.
To finish the cabinets off we went and bought new hardware for the drawers and doors, we were able to find packs of 10 knobs and pulls that matched and were pretty close to exactly what I wanted. Everyone who knows me knows I have an eye for expensive things...the pulls I wanted were $10 each and we needed something like 31 total...soooo I went the cheaper route and I'm more than happy with the way they turned out. We were able to clean up the hinges using CLR and they match the hardware almost perfectly!! I was Happy about that. Also because we ripped a whole section of cupboards out there was a section of unfinished cupboards showing so we went to Home Depot got some paint able wainscoting and got it cut to fit and where we took off the cabinet doors on the dining room side and all the "fake drawers" we added a sheet of wainscoting to clean it up and modernize it a bit more.
All that being said and DONE (finally!) the only things left to do in the kitchen is Counter tops, replace the appliances and the stove hood. Like everyone has told us, it will be never ending the things you can do and will want to do with your new home. Good thing about it is both Tyler and I are pretty hands on, DIY kind of people, so it keeps us busy.
Bre's Next House Project
Anyway so the reason I haven't been around is We Finally bought our very fist Home! Good-Bye apartments and renting! So we were a liiiittle busy with the move and all but we're finally

So the house we bought is a bit older, but has lots of things we can change and make it our own. Exactly what we were looking for. Tyler needed something he could work on, make his own little project. My first project....the kitchen. So I just realized I dont really have a great picture of the kitchen before...anyway here is one that shows most of it...with my crazy family :)


So with help from My wonderful mother and Bestie A, we got to work degreasing, stripping and refinishing these cabinets. Yes ALL of them. It took a lot longer than I anticipated but it was soooo worth it.
 |
| Cabinets Finished, Kitchen Painted, counter tops...next on the list! |
-ripped out section of cabinets
-changed light fixtures ($100 for both)
-changed hardware on cabinets and drawers ($55)
-painted cabinets($115.00)
-removed all cupboards from dining room side and added wainscoting ($24)
 |
| Close-up of finish and Hardware |
You can purchase the kit in many different colors with different glazes, we chose the "Quilters White" and literally put the glaze on and wiped it right off to get the effect we wanted. To get a little better idea of what you're buying the kit includes:
-Chemical Sander, paint stripper (so no sanding required with this revamp!)
-Small Can of paint (they tint it at home depot for you, to whatever color you choose)
-2 cans of stain
-Small can of Top Coat
-2 Green scrubbies (go to Costco and get a package...you're going to need them!)
-3 Paint stir Sticks
-Roll of dustless cloth (aka. Cheesecloth)
Its a fairly lengthy process, removing all the doors and hardware from the cabinets then cleaning them with a very strong cleaner (we used pure degreaser because of the age of the cabinets, there was a lot of built up grime) After that we used the chemical sanding solution that was provided in the kit, applying it using green scrub pads and just scrubbing the S**t out of it...switch arms for an even workout. After that is done and is dry you paint, 2 coats, and let that dry, then apply the glaze. The longer you leave this glaze on before wiping it off with the cloth provided, the more of the wood grain that will show through. Then last but not least you give it a "Top Coat" also provided.
To finish the cabinets off we went and bought new hardware for the drawers and doors, we were able to find packs of 10 knobs and pulls that matched and were pretty close to exactly what I wanted. Everyone who knows me knows I have an eye for expensive things...the pulls I wanted were $10 each and we needed something like 31 total...soooo I went the cheaper route and I'm more than happy with the way they turned out. We were able to clean up the hinges using CLR and they match the hardware almost perfectly!! I was Happy about that. Also because we ripped a whole section of cupboards out there was a section of unfinished cupboards showing so we went to Home Depot got some paint able wainscoting and got it cut to fit and where we took off the cabinet doors on the dining room side and all the "fake drawers" we added a sheet of wainscoting to clean it up and modernize it a bit more.
All that being said and DONE (finally!) the only things left to do in the kitchen is Counter tops, replace the appliances and the stove hood. Like everyone has told us, it will be never ending the things you can do and will want to do with your new home. Good thing about it is both Tyler and I are pretty hands on, DIY kind of people, so it keeps us busy.
Bre's Next House Project
 |
| Very white, half bath downstairs. |
 |
| to be transformed into a beach themed paradise haha |
Friday, March 2
Beer Battered Fish & Chips {recipe}
I've said it before and I'll probably say it a million times, I have such picky eaters in my house that I rarely get to try "different" recipes. One thing they aren't fond of here in the Cyr household is fish. Me on the other hand, I LOVE it. Every once in awhile I say "screw it!" and make whatever I want, last night was one of those nights. Although its far from a "different" recipe, I went with the classic Beer Battered Fish & Chips. I got this recipe from the Food Network Website.
Preheat Deep fryer or a large pot with about 3" of vegetable oil in the bottom on medium heat. (be very careful when using the pot method. It splatters and oil burns HURT ALOT!)
Beat the egg whites and beer together. Mix in all the dry ingredients.
Be sure your fish is fully thawed, if it was frozen, and dry. Use a dish towel or paper towels to make sure you dry it fully! (I did not dry some pieces completely and I had a hard time getting the batter to stick)
 Cut the fillets in 2 or 3 pieces, whichever you prefer, and dip them in the batter. Make sure they are fully covered in batter and then gently put the fish pieces into the oil or deep fryer.
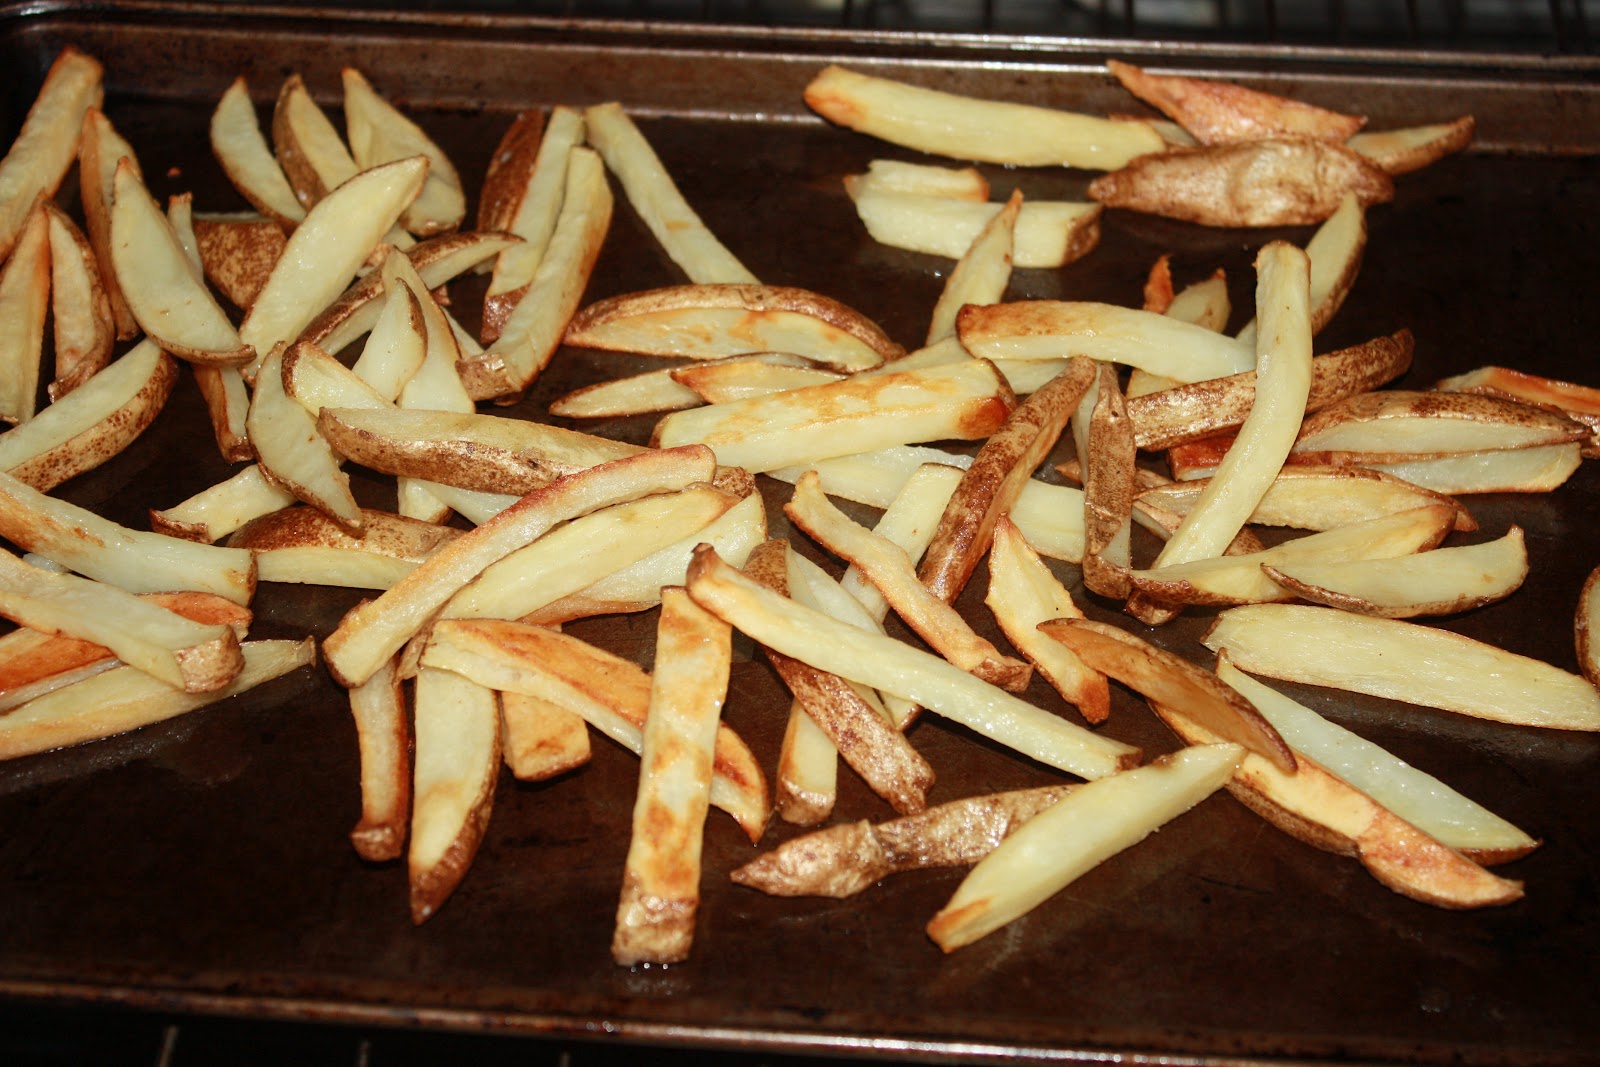
*TIP* Have everything ready to go before you put the fish in to cook, it doesnt take very long and you want to eat it as soon as it comes out of the fryer. So make the fries first, have them almost done, set up a little station something like this, and then FRY! Also have lots of Febreeze on hand for after supper, your house is going to STINK! But its so worth it!
Let the fish cook for 2-3 minutes per side, until its a nice golden Brown. Use a slotted spoon and an oven mitt to turn and get the fish out of the oil.
Serve with Lemon and Ketchup! & Enjoy!
Original Source
 |
| Beginnings of Fish and Chips. |
Beer Battered Fish and Chips
1 3/4 c Flour
2 tsp Baking Powder
1/2 tsp Mrs. Dash Spice Blend (or your favorite spice blend)
1/4 tsp cayenne pepper
1/2 tsp salt
2 egg whites
1 can (12 oz) Beer, or de-alcoholized beer
1 1/2 lbs firm white fish fillets, haddock or halibut (I used Haddock)
Preheat Deep fryer or a large pot with about 3" of vegetable oil in the bottom on medium heat. (be very careful when using the pot method. It splatters and oil burns HURT ALOT!)
Beat the egg whites and beer together. Mix in all the dry ingredients.
Be sure your fish is fully thawed, if it was frozen, and dry. Use a dish towel or paper towels to make sure you dry it fully! (I did not dry some pieces completely and I had a hard time getting the batter to stick)

*TIP* Have everything ready to go before you put the fish in to cook, it doesnt take very long and you want to eat it as soon as it comes out of the fryer. So make the fries first, have them almost done, set up a little station something like this, and then FRY! Also have lots of Febreeze on hand for after supper, your house is going to STINK! But its so worth it!
 |
| Best to be prepared, have your little work station all set up. |
 |
| ...and your "chips" just about ready. |
 |
| BE CAREFUL!! Or you'll end up with little red dots all over your arm like moi...not cool. |
 |
| Golden Beer Battered Fish, perfect for pub night at home. |
 |
| Fish and Chips Mates? |
Original Source
Thursday, March 1
Who Needs A Photo Booth?
So I've decided to take a break from packing and staring at the mess of boxes everywhere to work on a few things for St Patrick's Day. When we had parties we used to take so many pictures, but these days we've stopped for some reason...and I don't like it ONE LITTLE BIT! So I was thinking we could have a few little props around and make it more fun. As always we like to do things on a very small budget, takes a bit of research but it CAN and will be done! Step one, find the props to fit your party style!
I found these Free Photo Booth Printables from Oh Happy Day
Then To Go with the "accessories" I found some classic Moustaches and Lips on the Catch My Party Site, provided by the Paper Dolls Shoppe.
Knowing the attendees of our parties, we should get some doozie pictures on St Patty's Day.
Here's another link for some hats, glasses and speech bubbles Ill be adding to the collection. These Photo Booth Props are from Accent the Party. Remember All you need is card stock, hot glue gun, dowels or skewers (for the smaller ones) and you've got the ingredients for some serious picture taking! And don't toss them after the party, keep them and pull them out for your next shindig.
I found these Free Photo Booth Printables from Oh Happy Day
 |
| photo props from "Oh Happy Day" |
 |
| Photo Props from Paper Dolls Shoppe |
Knowing the attendees of our parties, we should get some doozie pictures on St Patty's Day.
Here's another link for some hats, glasses and speech bubbles Ill be adding to the collection. These Photo Booth Props are from Accent the Party. Remember All you need is card stock, hot glue gun, dowels or skewers (for the smaller ones) and you've got the ingredients for some serious picture taking! And don't toss them after the party, keep them and pull them out for your next shindig.
 |
| Binks trying out some props! I think they'll be perfect. |
Thursday, February 23
Beginning Of St Pattys day {& apologies!}
OK I realize I have been MIA for a while, haven't been doing much cooking or crafting these days just started PACKING!! The Husband and I just bought our first house, which was very stressful and overwhelming, but now that that part is all over its time to pack this place up and move on! The house we are moving into needs some Bre touches, so I fore-see a few blog posts about painting, decorating and re-doing cabinets. Once we are moved in and settled I'll be posting Before and After photos on the Blog.
Lately I have been working on some ideas for the St Patricks Day Party we will be hosting. I have a link to some Free Printables to share too, from Bird's Party.
Don't forget about the Subway art from eighteen25 I posted about not long ago, they do have a St Patty's Day one! The eighteen25 Blog also has a St Patty's day themed "You Gotta See This" post, you can see all those ideas here.
I have also cut and glittered another cardboard banner for the occasion, not quite done but here's where I'm at with that. Needs some ribbon and some kind of accent on the background I think.
Other than making THIS Leprechaun craft with Charlee the other day, that has been the extent of my creativity these days =( Im hoping to get all the St Patricks Day things out of the way before the Big move, so I'll be updating you on ideas, and menus. Keep Checking back!
Lately I have been working on some ideas for the St Patricks Day Party we will be hosting. I have a link to some Free Printables to share too, from Bird's Party.
Don't forget about the Subway art from eighteen25 I posted about not long ago, they do have a St Patty's Day one! The eighteen25 Blog also has a St Patty's day themed "You Gotta See This" post, you can see all those ideas here.
I have also cut and glittered another cardboard banner for the occasion, not quite done but here's where I'm at with that. Needs some ribbon and some kind of accent on the background I think.
 |
| My one lonely little craft... |
Other than making THIS Leprechaun craft with Charlee the other day, that has been the extent of my creativity these days =( Im hoping to get all the St Patricks Day things out of the way before the Big move, so I'll be updating you on ideas, and menus. Keep Checking back!
Wednesday, February 15
Pintrest & Subway Art
Ok I realize that "Subway Art" has been around for awhile, you see it everywhere. At first I didn't really get it, but I must say...I have grown to love it! So today while cruising around pintrest I came across this really cute St Patty's Day one, and it was posted on a "Printables" board, so I went to check it out. JACKPOT!
On this site, eighteen25 they have Subway Art for every Holiday and then some other cute ones too. So I've decided to share, its such a cute and low cost way to decorate for a party or just your home. Cute frame a Costco Print and you're on your way. Here is your first step, FREE Printable Subway Art.
On this site, eighteen25 they have Subway Art for every Holiday and then some other cute ones too. So I've decided to share, its such a cute and low cost way to decorate for a party or just your home. Cute frame a Costco Print and you're on your way. Here is your first step, FREE Printable Subway Art.
While your there, be sure to check out the rest of their site, its really great. They also have many many pintrest boards all of which are filled with great Pins.
This was my great find for the day, so I thought I`d share. If you have Pintrest and want to see what I`ve been looking at you can!
Thursday, February 9
Homemade Bread--From Scratch!
When I was in College, taking cooking, we used to bake bread almost every day, and it always turned out. Taking my newly learned skills home, I tried this same recipe for bread...well folks I ended up with an inedible DOOR STOP! Very discouraging when you spend hours, kneading and waiting, and portioning and waiting some more, only for it to NOT rise when its in the pan and become nothing more than a solid mass. I didn't make bread for years.
About 2 years ago Mom and Dad gave me their bread maker, so I decided to try again, I made the dough in the bread maker then took it out to rise and bake in the oven. (These were the days before the Kitchen-Aid) It was edible, but it wasn't that AMAZING homemade bread like Grandma made. So after a few attempts I gave up on this too.
A few weekends ago mom and dad came up to Babysit the littlemonster Princess and brought homemade bread they had made. It was soooo good. The urge to play Suzy homemaker and try again came over me, and today I finally did it. And in case you hadn't guessed by the post, IT WORKED!


Here is the recipe I used, its from the old school Purity Cookbook like your Mother and Grandmother had. I halved it because...well I didn't need 17 loaves (well not quite) of Bread for our house. You can make the whole thing and freeze it, I'll probably do this next time, now that I know I can actually do it.
Dissolve 1 tsp sugar in 1/2c warm water and sprinkle 1 package of yeast over the top, 8g. let sit for 10 minutes, then whisk with a fork.
Scald 1c of milk
Pour into a large bowl and add:
2 tbsp sugar
2 tsp salt
2 tbsp shortening
1/2 c water
Stir until the shortening melts, cool to lukewarm.
Add yeast mixture to milk and add 2 1/2 c flour. Mix (I used my Kitchen-Aid, with the dough hook attachment)
Gradually add 2-2 1/2 c flour, ensuring that each time the flour is mixed into the dough. You may need to add it all or not. I ended up using 4 1/4(ish) cups of flour when I made it this morning. If your dough becomes too dry, add some water 1 tbsp at a time.
Cover and let rise for 1 1/2 hours, until doubled, in a warm place.
(Bre's proofing Trick: When I start getting stuff ready for the bread I turn the oven on 300. I then turn it off and keep the door shut, when I'm ready for the bread to rise I stick it in the oven covered with a dish towel, and leave the oven door open a crack. Works like a charm!)
Punch Down and put in greased pans, as rolls or loaves, cover and let rise to double the size and bake at 425 for 30-35minutes. (check at 20)
When you tap on the top of the loaf and it sounds hollow, that's when you know its ready. (trick from school)
About 2 years ago Mom and Dad gave me their bread maker, so I decided to try again, I made the dough in the bread maker then took it out to rise and bake in the oven. (These were the days before the Kitchen-Aid) It was edible, but it wasn't that AMAZING homemade bread like Grandma made. So after a few attempts I gave up on this too.
A few weekends ago mom and dad came up to Babysit the little


*Insert Very very Very Happy Dance here*
Not only does it LOOK like bread and smell like bread, when you pick it up, its light and squishy and I don't think it would make a very good Door Stop.Here is the recipe I used, its from the old school Purity Cookbook like your Mother and Grandmother had. I halved it because...well I didn't need 17 loaves (well not quite) of Bread for our house. You can make the whole thing and freeze it, I'll probably do this next time, now that I know I can actually do it.
White Bread
(Makes 1 loaf; 1 pan rolls)
Dissolve 1 tsp sugar in 1/2c warm water and sprinkle 1 package of yeast over the top, 8g. let sit for 10 minutes, then whisk with a fork.
Scald 1c of milk
Pour into a large bowl and add:
2 tbsp sugar
2 tsp salt
2 tbsp shortening
1/2 c water
Stir until the shortening melts, cool to lukewarm.
Add yeast mixture to milk and add 2 1/2 c flour. Mix (I used my Kitchen-Aid, with the dough hook attachment)
Gradually add 2-2 1/2 c flour, ensuring that each time the flour is mixed into the dough. You may need to add it all or not. I ended up using 4 1/4(ish) cups of flour when I made it this morning. If your dough becomes too dry, add some water 1 tbsp at a time.
Cover and let rise for 1 1/2 hours, until doubled, in a warm place.
(Bre's proofing Trick: When I start getting stuff ready for the bread I turn the oven on 300. I then turn it off and keep the door shut, when I'm ready for the bread to rise I stick it in the oven covered with a dish towel, and leave the oven door open a crack. Works like a charm!)
Punch Down and put in greased pans, as rolls or loaves, cover and let rise to double the size and bake at 425 for 30-35minutes. (check at 20)
When you tap on the top of the loaf and it sounds hollow, that's when you know its ready. (trick from school)
Tuesday, February 7
Valentine Votive Holders
So I went on a Pintrest Binge last night and this morning...last thing I did before bed last night, PINNED....first thing I did this morning (after feeding Binks and making coffee of course)...PINNED! Yikes....this is getting out of control. BUT! I did find a tip on how to make my crappy dishwasher work better, on Pintrest, and then actually DID IT. Ill keep you posted on how it works.
When I finally pulled myself away from Pintrest, Charlee wanted to decorate for Valentine's Day. So I went and pulled out all the little things we had to put up around, then realized "this isn't enough!". Back to Pintrest! oh god.
Here is what I found! Mason Jar Votive Holders, they look super cute as a centerpiece when they are bundled together. Different sizes would be adorable, but I only had 1 size jar on hand so this is what I ended up with.

All you need:
Glue or tape the doilie to the jar. Tape the heart in the center of the doilie.
Wrap your twine or ribbon around a few times and tie with a bow.
Drop a votive down in the jar and light it up for a romantic centerpiece. You can add some sand or coarse salt in the bottom of the jar to raise the candle up a little bit and make it easier to light.
I used tape so I could use the mason jars again after Valentines Day. Maybe revamp these only with a country theme to match my kitchen, hmmm.
 |
| Sadly I found this Picture on Pintrest...My Name is Bre and Im a Pintrest addict. |
So I went on a Pintrest Binge last night and this morning...last thing I did before bed last night, PINNED....first thing I did this morning (after feeding Binks and making coffee of course)...PINNED! Yikes....this is getting out of control. BUT! I did find a tip on how to make my crappy dishwasher work better, on Pintrest, and then actually DID IT. Ill keep you posted on how it works.
When I finally pulled myself away from Pintrest, Charlee wanted to decorate for Valentine's Day. So I went and pulled out all the little things we had to put up around, then realized "this isn't enough!". Back to Pintrest! oh god.
Here is what I found! Mason Jar Votive Holders, they look super cute as a centerpiece when they are bundled together. Different sizes would be adorable, but I only had 1 size jar on hand so this is what I ended up with.

All you need:
- mason jars
- sm. doillies
- fabric (or scrapbook paper would work too)
- thin ribbon or twine
- tape or glue
- votives
Glue or tape the doilie to the jar. Tape the heart in the center of the doilie.
Wrap your twine or ribbon around a few times and tie with a bow.
Drop a votive down in the jar and light it up for a romantic centerpiece. You can add some sand or coarse salt in the bottom of the jar to raise the candle up a little bit and make it easier to light.
I used tape so I could use the mason jars again after Valentines Day. Maybe revamp these only with a country theme to match my kitchen, hmmm.
Monday, February 6
Super Bowl Recap!
After last nights game we had a room full of disappointed men, here we are Pats fans, if you hadn't already guessed. Although it was a great game until the very last play. Anyway if you're here reading this blog...chances are you couldn't care less about the Football game, so Ill get right to it. Here's an overview of the Super Bowl Spread we had last night. I've been feeling under the weather since Thursday so I apologize, I took the easy route yesterday and did Bre's Rendition of the Hostess with With Mostess' Super Bowl Party. One of my absolute favorite blogs, for multiple reasons, check her out and I assure you it won't be the last time you check her blog for Party ideas.
I used her Printable Snack Baskets to hold the "Team Spirit Popcorn" (recipe is also on that page). Very easy and so good. Perfect for a kids party too!

I didn't use the printable popcorn boxes because ...well...I liked these ones better. Simple as that!

Made a little Centerpiece for the table using some more free printables I posted on my Super Bowl Recipe Mashup Post.

Some team flags I chose to use them on straws, can also be used on Beer Bottle Necks, wine glass stems or as cupcake toppers.
For Bre's Super Bowl Menu, and recipes check out my Previous Post!
For tons more great party ideas and recipes be sure to check out The Hostess With the Mostess Blog! You won't be disappointed!
Now ....back to the couch with Hot Lemon to watch Disney Junior with my Sick Princess, I can feel another Lysol Spray and Wipes day coming on this week.
I used her Printable Snack Baskets to hold the "Team Spirit Popcorn" (recipe is also on that page). Very easy and so good. Perfect for a kids party too!
 |
| Team Spirit Popcorn-Berry Blue |

I didn't use the printable popcorn boxes because ...well...I liked these ones better. Simple as that!

 |
| Football Cupcakes |

Some team flags I chose to use them on straws, can also be used on Beer Bottle Necks, wine glass stems or as cupcake toppers.
For Bre's Super Bowl Menu, and recipes check out my Previous Post!
For tons more great party ideas and recipes be sure to check out The Hostess With the Mostess Blog! You won't be disappointed!
Now ....back to the couch with Hot Lemon to watch Disney Junior with my Sick Princess, I can feel another Lysol Spray and Wipes day coming on this week.
Saturday, February 4
More Free Superbowl Printables
Superbowl Sunday is TOMORROW!! In case you are the one hosting the party and want to add a little something here's a little link to help you out from the Hostess with Mostess Blog, and she is just that.
Here is another Link with some Patriot and Giants Printables to add a little friendly competition to your party.
You'll see these being used tomorrow afternoon at our get together and I hope you can put them to good use too. Or keep them for a Football themed Birthday Party.
What will you be serving at your Super Bowl Party? Here's What I'll be serving up: Homemade Pizza, Marshmallow Oreo Squares, Marble Cupcakes (of course!), Cream Cheese in Phyllo Cups. The recipes for the Pizza Crust, Oreo Squares and Cream Cheese Appie are all on my Super Bowl Recipe Mash-Up. Be sure to check it out for some easy and delicious recipes to serve your guests or bring to the party you're attending. Also some different Free Printables on this post! Enjoy! :)
Sunday, January 29
Superbowl Recipe Mashup
Hey all you sports fans and foodies! As you know the Superbowl is coming up in one week, even if you don't watch football all year it seems the Superbowl is the one football we can all stomach. And I say this because its just as much about the food and the beer, as it is the actual game. I've gone through and pulled out some recipes from previous blog posts for you to browse for YOUR Superbowl party. Some people might look at these recipes and think "Not Superbowl worthy", but you don't have to eat only Deep fried wings and nachos, not saying people don't enjoy those things because I certainly do, but why not add something a little different to the mix too!?
So whether you watch it for the sport, the commercials or the food....Enjoy!
Here are some Free Party Printables for Game Day if you want to add something a little special to your party.
--Printables from Birds Party, one amazing Party Chick.
 |
| Sunday Feb. 5th 2012, Giants vs Patriots |
So whether you watch it for the sport, the commercials or the food....Enjoy!
Finger Foods:
Mains:
Homemade Dry Rub...Good on Baked Potato Wedges too!
Sweet Stuff:
OK so this Oreo Squares Recipe is my MOST Popular post, 4 times the views than any other (non-giveaway) post!! Make these a must at the Party!Here are some Free Party Printables for Game Day if you want to add something a little special to your party.
--Printables from Birds Party, one amazing Party Chick.
Thursday, January 26
Oreo Layer Dessert
It seems like a long time since I did a recipe post, so I'm doing this one for YOU GUYS!! Pintrest, my ultimate weakness since December, led me to this divine recipe. Sad thing about it, I'm lactose intolerant so I cant even enjoy a big honkin' bowl of it. *sad face* Anyway I had a tiny taste while I was assembling juuuust to make sure it was as good as it looked.
Ill be doing a compilation of recipes, some mine, some new, for the Superbowl! So you'll have to check back for those if you're entertaining or attending a Superbowl party. This might be a good one to use What sports loving man doesn't enjoy a good Chocolate overdose?
1}. Prepare Chocolate Pudding according to package, and let set up in the fridge.If you're using half Dream Whip Topping, prepare this too and let set up in the fridge.

2}. Put all the cookies in a food processor (recommend) or a ziploc bag, and smash the living daylights out of them :) Pour them into a 9x13 pan (but save 1/2 c, or so for the top) and pour the melted butter over top, mix with your hands then spread over the bottom of the pan to form a "crust". Chuck it in the fridge for a bit while you're getting the other stuff done.
3}. Cream your Cream Cheese until smooth, then add in your 1 cup of icing sugar. Blend. Add 1 tub of Cool Whip and mix all that goodness together.
4} Take the crust, and the pudding out of the fridge, spread the chocolate pudding over the crust (layer 1) then spread the cream cheese mixer over the pudding (layer 2). I added a drizzle of caramel ice cream topping about here....Then layer your 2nd tub of cool-whip (or bowl of dream whip) on top of that.
5} Sprinkle with the 1/2 c of Oreo Crumbs you saved, and maybe a little more of that Caramel (or chocolate) sauce.
Cover and put in the fridge until you're ready to serve.
Tonight my parents are coming for supper because Hubby and I are going to The Trews Concert!!! Very excited! So Im making Rachael Ray's Chicken Stew With Biscuits, the recipe on my Recipe Sharing Post, which is a hugely popular post! Then I thought I'd make this little treat for them as well.
Ill be doing a compilation of recipes, some mine, some new, for the Superbowl! So you'll have to check back for those if you're entertaining or attending a Superbowl party. This might be a good one to use What sports loving man doesn't enjoy a good Chocolate overdose?
 |
| Tastes way better than it looks. Its not one of those Fancy-Smancy Desserts thats for sure |
Oreo Layer Dessert
1 pkg of regular
Oreos
1/2 c of
melted butter (I only used about 1/3 c)
1 LRG box of instant
chocolate pudding (the one that takes 3 cups of Milk)
2 --8 oz containers of Cool
Whip
8 oz. of cream
cheese, softened (thats 1 block)
1 c icing sugar
 |
| Look at these ingredients, you just KNOW its going to be good. |
1}. Prepare Chocolate Pudding according to package, and let set up in the fridge.If you're using half Dream Whip Topping, prepare this too and let set up in the fridge.
 |
| Ever notice EVERY time you make Chocolate pudding it ends up Everywhere?!? |
 |
| I gave Charlee the rolling pin and she smashed up the cookies. |

2}. Put all the cookies in a food processor (recommend) or a ziploc bag, and smash the living daylights out of them :) Pour them into a 9x13 pan (but save 1/2 c, or so for the top) and pour the melted butter over top, mix with your hands then spread over the bottom of the pan to form a "crust". Chuck it in the fridge for a bit while you're getting the other stuff done.
3}. Cream your Cream Cheese until smooth, then add in your 1 cup of icing sugar. Blend. Add 1 tub of Cool Whip and mix all that goodness together.
4} Take the crust, and the pudding out of the fridge, spread the chocolate pudding over the crust (layer 1) then spread the cream cheese mixer over the pudding (layer 2). I added a drizzle of caramel ice cream topping about here....Then layer your 2nd tub of cool-whip (or bowl of dream whip) on top of that.
 |
| Everything is better with caramel drizzle ok! |
5} Sprinkle with the 1/2 c of Oreo Crumbs you saved, and maybe a little more of that Caramel (or chocolate) sauce.
Cover and put in the fridge until you're ready to serve.
Tonight my parents are coming for supper because Hubby and I are going to The Trews Concert!!! Very excited! So Im making Rachael Ray's Chicken Stew With Biscuits, the recipe on my Recipe Sharing Post, which is a hugely popular post! Then I thought I'd make this little treat for them as well.
Tuesday, January 17
Mommy Moment: Time Out Jar
I thought I'd take a second to share a quick Mommy Tip with all your fellow Moms. I originally came across this idea on a Blog found on Pintrest, the Blog was called "Play at home Mom". Now this woman is amazing, her playroom is a dream, the things she does with her kids are unreal, I have since visited her Blog multiple times. Today Charlee and I had a play date with one of our favorite little girls (and Moms!) and we did one of her Crafts with the girls. Window Art! A very easy, fun and quick (for those who have short attention spans when it comes to crafts!) craft! They turned out awesome!
 |
| One of Charlee's Beautiful Creations |
Monday, January 9
Recipe Sharing!
Signs You’re A Lousy Cook
Your family automatically heads for the table every time they hear a fire siren.
Your kids know what “peas porridge in a pot nine days old” tastes like.
Your son goes outside to make mud pies, they rest of the family grabs forks and follows him.
Your kids favorite drink is Alka-Seltzer.
You have to buy 25 pounds of do good twice a week for your toy poodle.
Your kids got even with the neighborhood bully by inviting him over for dinner.
Your kids got suspended from school for trying to smuggle toxic waste in their lunch bags.
Your husband refers to the smoke detector as the oven timer.
No matter what you do to it, the gravy still turned bright purple.
You burned the house down trying to make jelly.
If this is you....You need to check out these recipes and Bookmark these 2 sites Im about to tell you about!Your family automatically heads for the table every time they hear a fire siren.
Your kids know what “peas porridge in a pot nine days old” tastes like.
Your son goes outside to make mud pies, they rest of the family grabs forks and follows him.
Your kids favorite drink is Alka-Seltzer.
You have to buy 25 pounds of do good twice a week for your toy poodle.
Your kids got even with the neighborhood bully by inviting him over for dinner.
Your kids got suspended from school for trying to smuggle toxic waste in their lunch bags.
Your husband refers to the smoke detector as the oven timer.
No matter what you do to it, the gravy still turned bright purple.
You burned the house down trying to make jelly.
Friday, January 6
Homemade Hummus
Calling all Fellow Hummus Lovers!!
I don't think there are any hummus recipes that are really "hard", more or less trying to get one that has the right proportion of ingredients. Hummus has become one of my favorite snacks for entertaining and evening snacks, it has become a staple on the shopping list. So I figured I'd save a couple bucks by making it myself, I make everything else! We usually shop at Sobeys, and they have a great international food section but one thing they don't have (at our local Sobeys anyway) was tahini paste. BUT! Alas they carry it at Superstore in many sizes, I bought the Tahina Brand, 1lb for less than $5.
So finally today, I pulled out all the ingredients and whipped up a double batch of Sun dried Tomato Hummus. So far so good! The recipe says that you can keep it in the fridge for up to 3 days and even freeze it for up to a month! Hence the double batch!
So this is the recipe I used, then decided to step it up and add some sun dried tomatoes to half.

Wednesday, January 4
Happy 2012
Happy New Year to all yee Blog Readers and Bloggers!! I know its a llliiiiiittttllleee late, but better late than never. Thank you to everyone who read my Blog and supported my site over the past year. Love reading the comments and hearing that people actually try the recipes and check out the tips and tricks. Makes it all worth while.
Also in the past year I've managed to get somewhat of a small business started up, Bre's Cupcakes. My goal for 2012, take it to the next level, I'm ready! A big thank you to all my friends for being taste testers extraordinaire, and of course to all my customers! Hope to see you back in the New Year.
So thank you to everyone for stopping by, reading my rants and recipes and leaving feedback! Wish you all a wonderful 2012!
Subscribe to:
Posts (Atom)